Je moet een widget, rij of vooraf gebouwde lay-out toevoegen voordat je hier iets ziet. 🙂
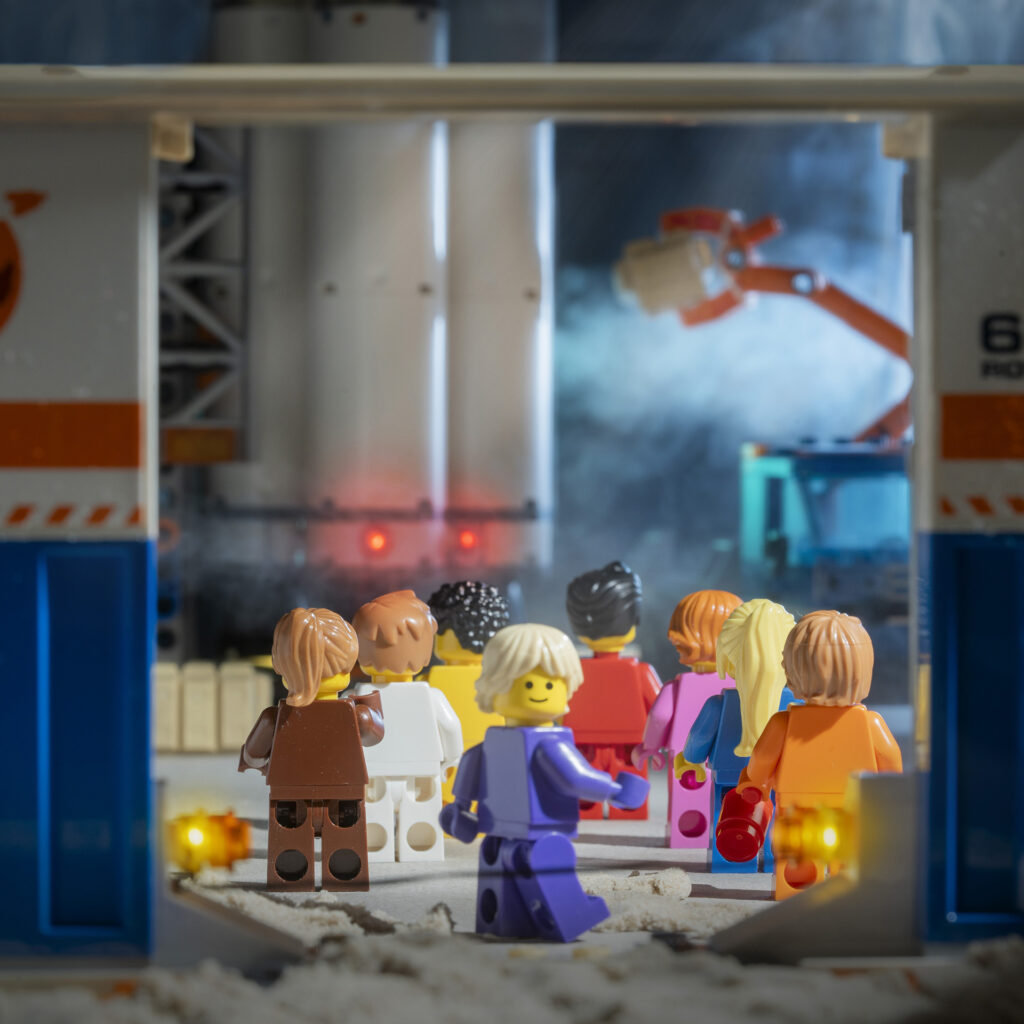
After a long bus drive, the whole crew arrives at the space center. The rocket is already filled with oxygen, equipment is being loaded. Quick to the briefing room. Launch will be in t minus..
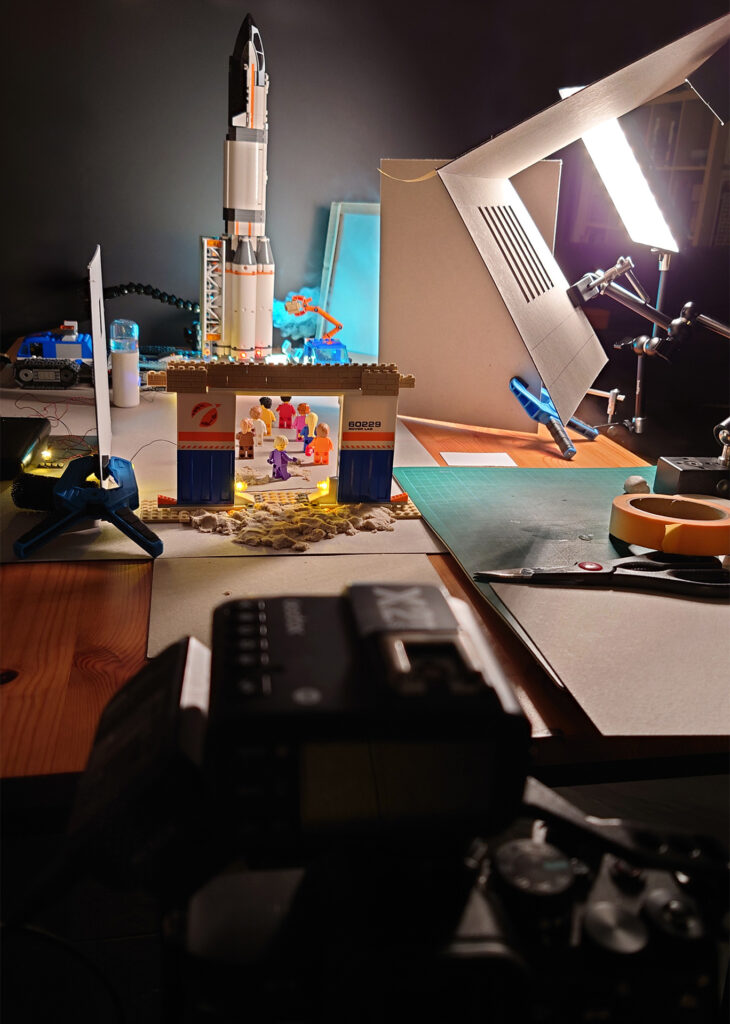
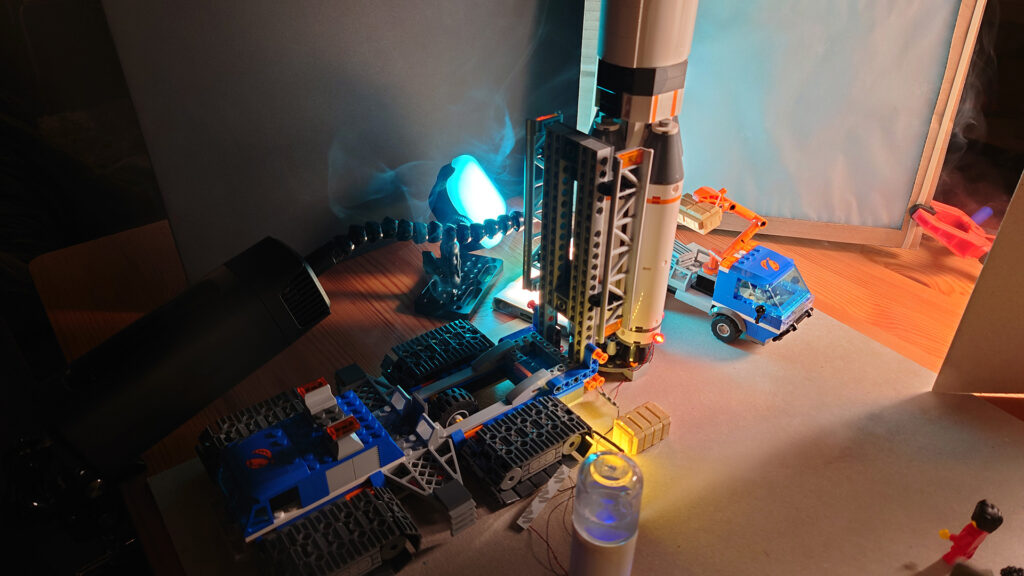
Behind-the-scenes
Camera Settings:
Sony A7IV & Sony 90mm Macro lens
1/60th of a second, F16 Iso 200
Lighting:
There are two Godox tt600s as main lights. One on the Ulanzi Filmog Ace, the other on the Minifigures
A Phottix m200 is behind the rocket to further highlight the smoke
The sliding doors and rocket have Game of Bricks Leds
Build:
The buildings are from Lego set #60229 Rocket Assembly & Transport
Fog from the rocket with an Ulanzi FIlmog Ace
Particle lights (rocket & sliding door) from Game of Bricks LED lights
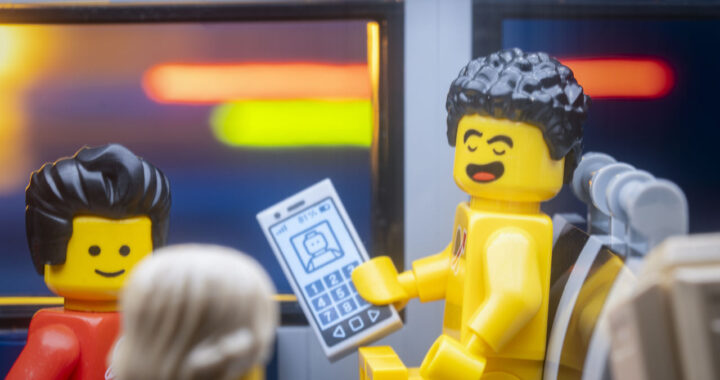
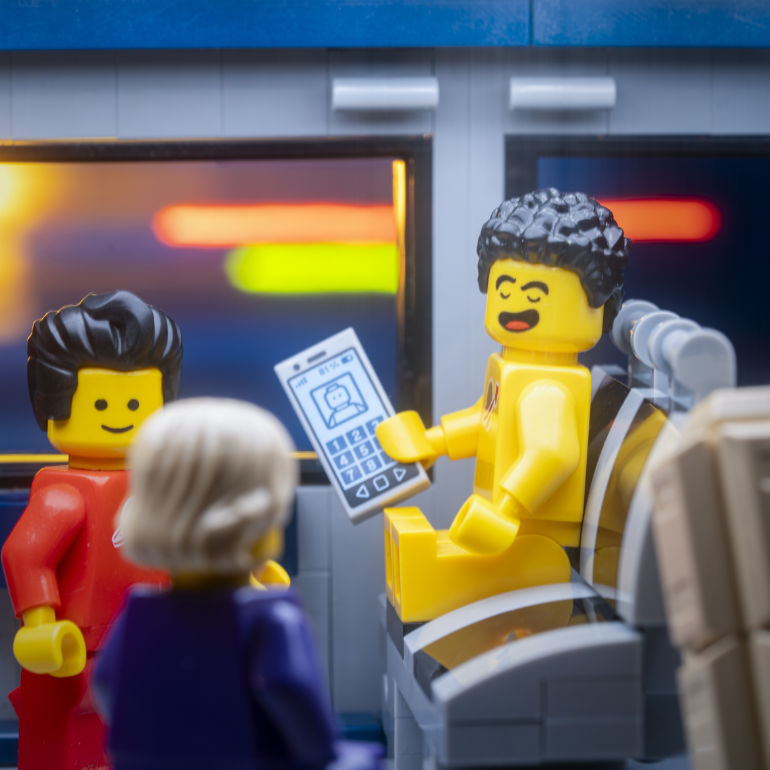
‘Yeah I’ve had my ticket for ages. Knew I was going on this mission since I was 12. My family has all the connections you know!”
This week the challenge was ‘zoom burst’ technique and transportation hub. Our space heroes are going to the launch site. By bus. Since I didn’t use a zoom lens, I’ve done a Pan shot where the background is static and the bus and minifigures move with the camera. The whole background build was interesting to learn from since I never built such a backdrop, you see the results of all the effort clearly in the bus window 🙂
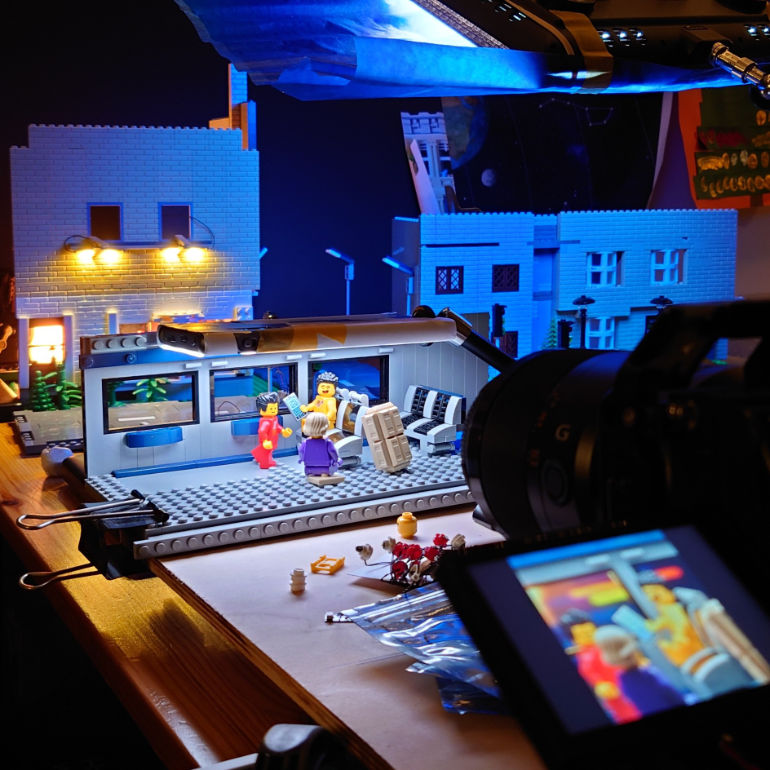
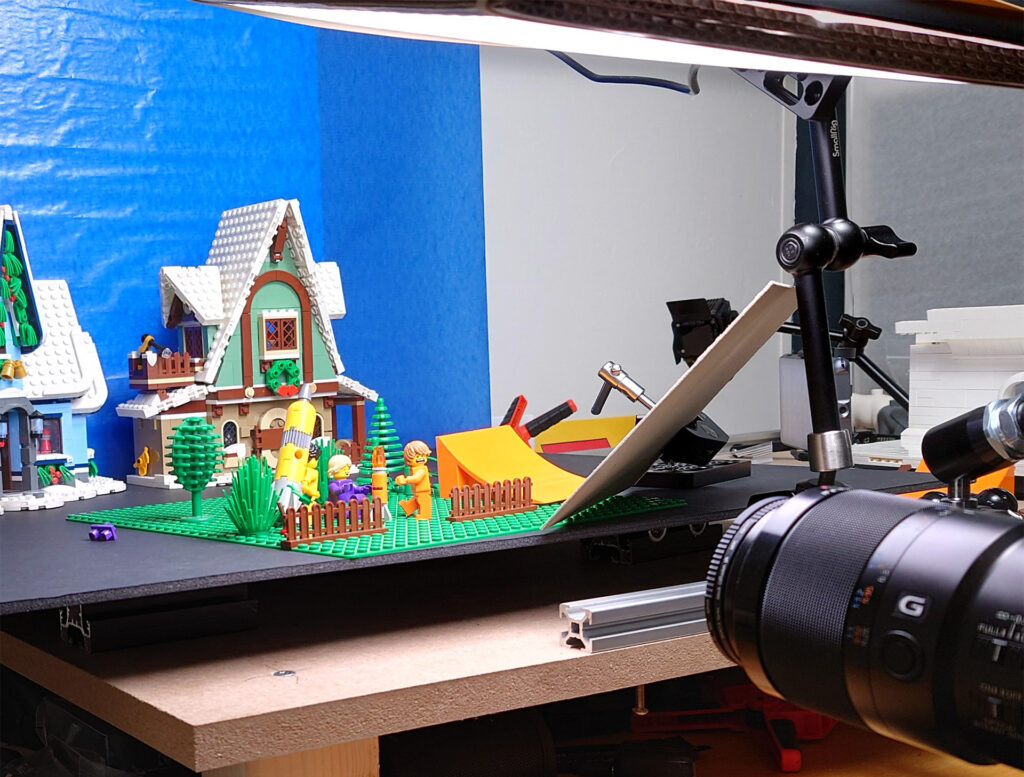
Behind-the-scenes
Camera Settings:
Sony A7IV & Sony 90mm Macro lens
1.6 seconds f11 Iso 100
Build:
The image (build) is split into two sections, the inside of the bus, and the outside environment. Both are brick-built and not based on an existing set
The bus with the camera is set on a slider. This way they are in focus and sharp. The slider moves through the environment which makes the environment pass by and blurs it
Lighting
The bus is lit with a Phottix M200 with some paper wrapped around it to make it more even light
The environment is lit with a Yongnuo YN600 Air video light panel with a sheet of blue paper around it for a dusk effect
The houses and stoplights are lit with Game of Bricks LED lights
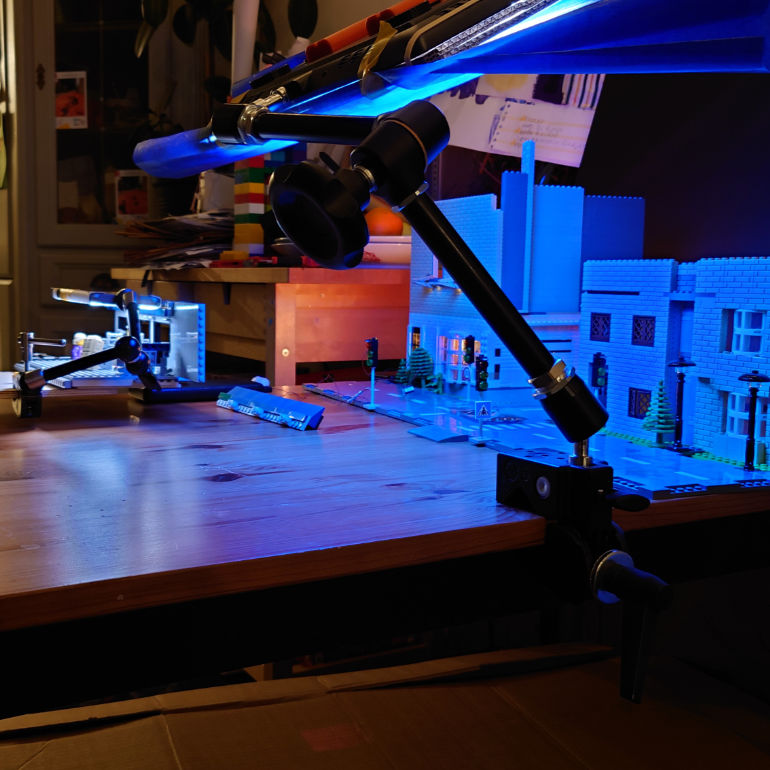
Slider
The bus and camera are set on a DIY slider. The base is a 20×40 mm aluminum extrusion profile used for 3D printers. The slider is a 3D printed sled with geared wheels on it. On the sled is a leftover wooden panel. The slider is a work in progress. When it’s more refined I want to share the models to 3D print in the resources section.
Brickbuild bus side with the camera on a sliderBrickbuild backdrop with particle lights
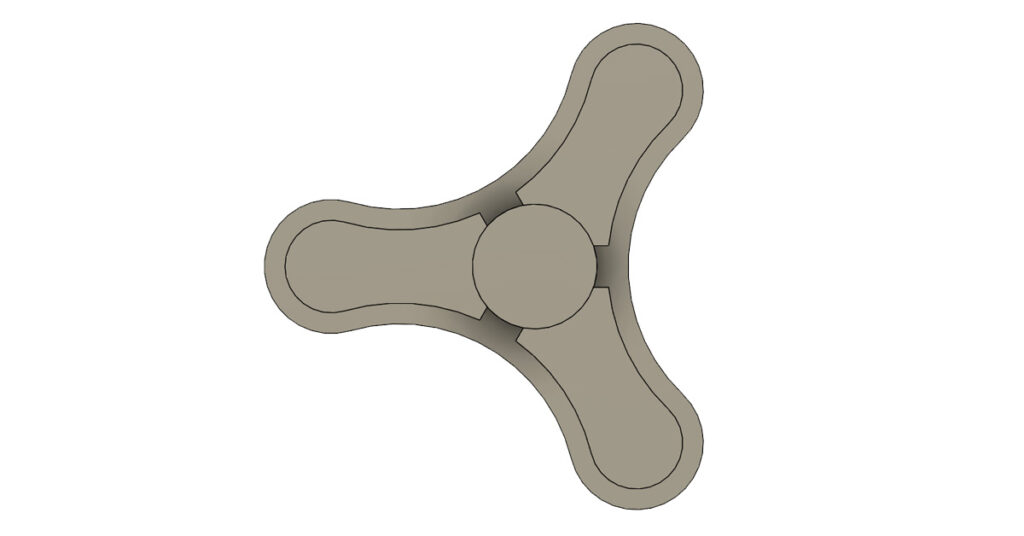
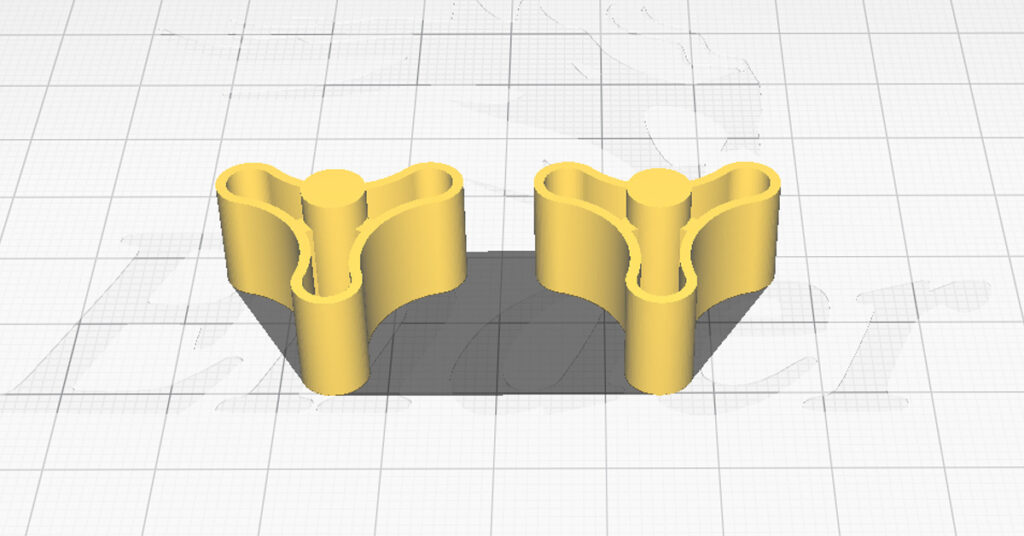
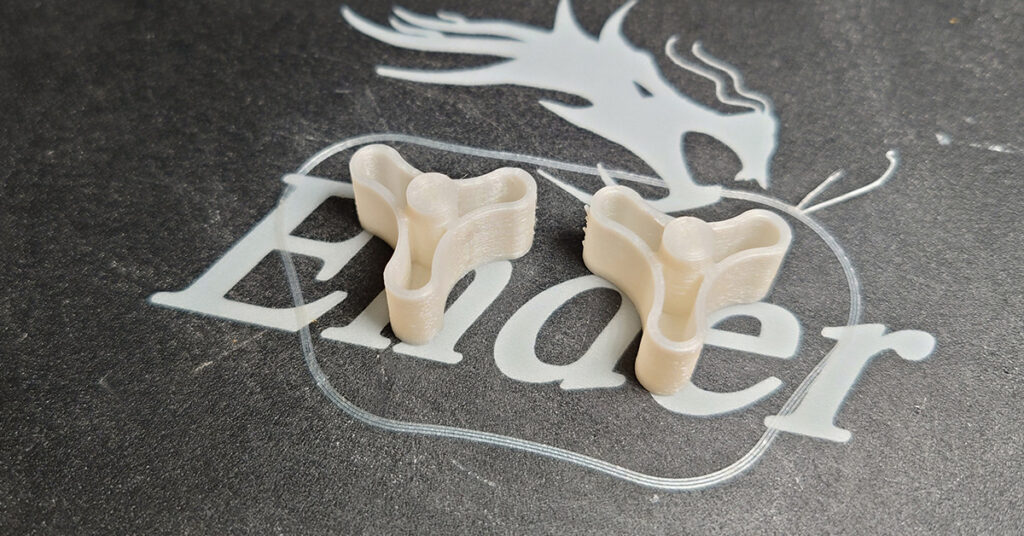
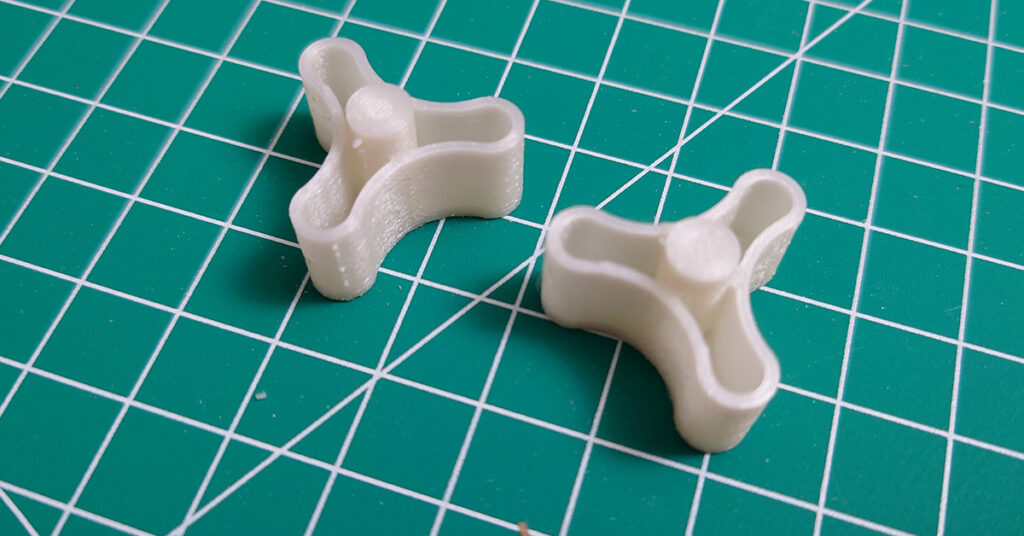
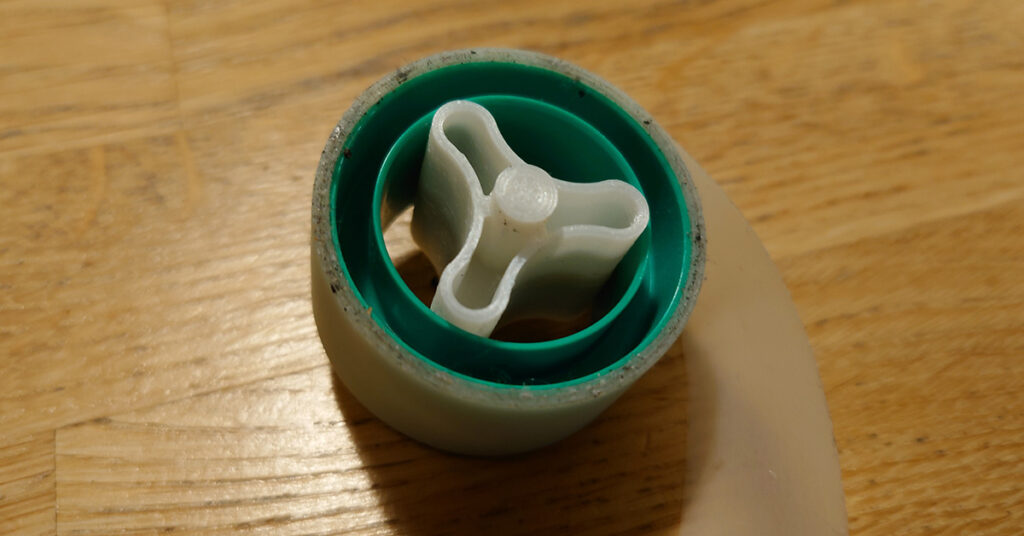
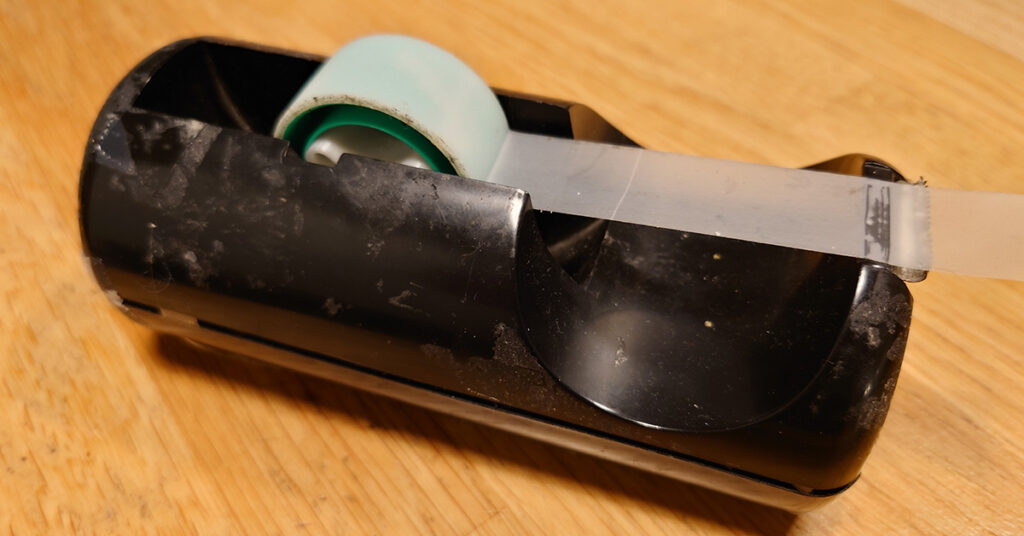
At home, we sometimes lose stuff that renders the objects unusable. Say, last week our kids lost the part on which you put the tape in a tape dispenser… So here is a downloadable GCode file and STL file to 3D print your replacement part. for a tape dispenser.
The GCode is for high-quality print on the Creality ender-3. The STL can be imported to Cura or another preferred slicer and sliced there.
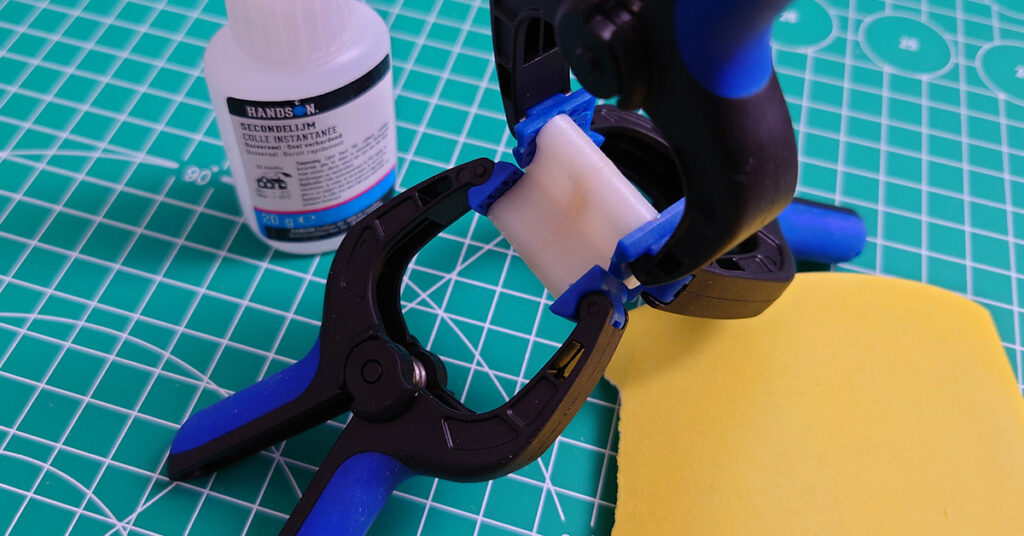
After printing you need to glue the two parts together.
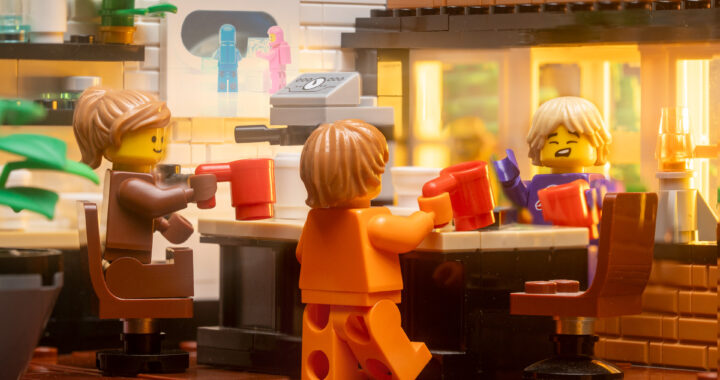
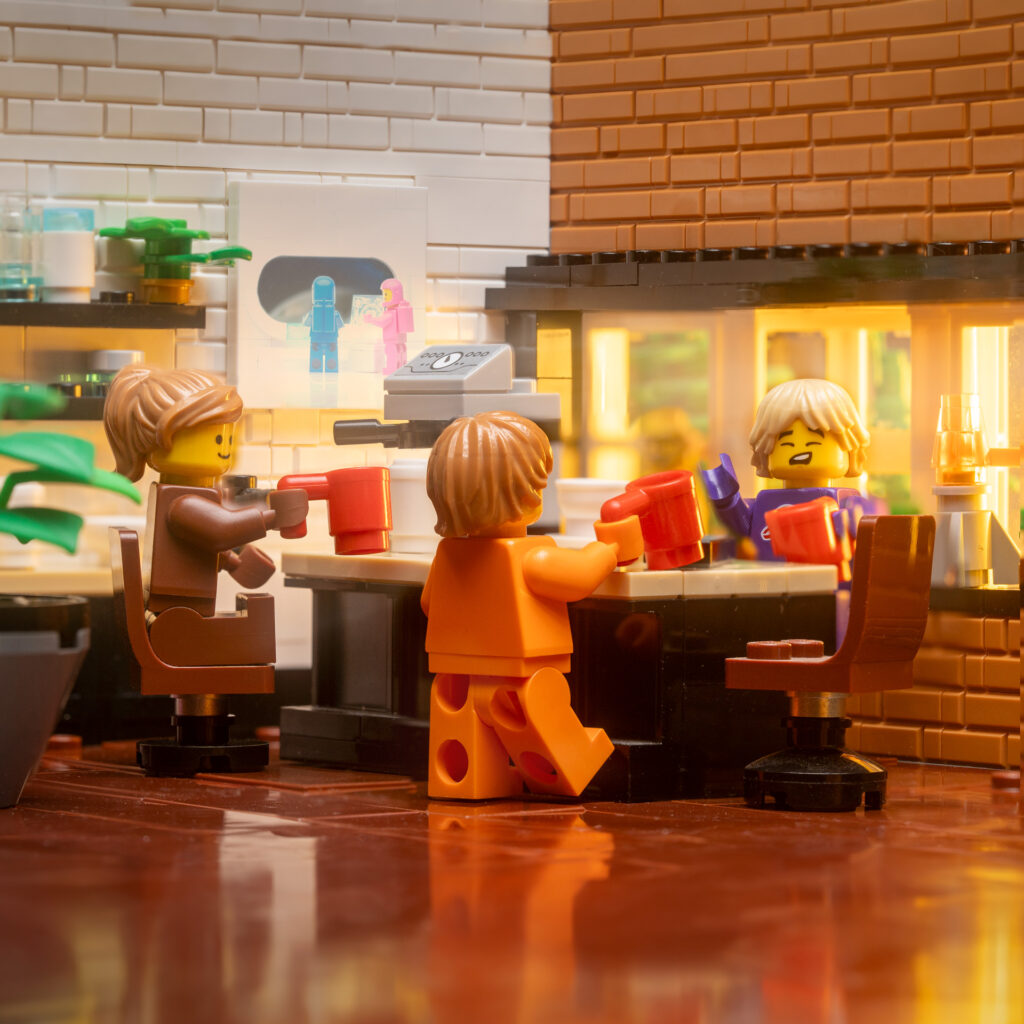
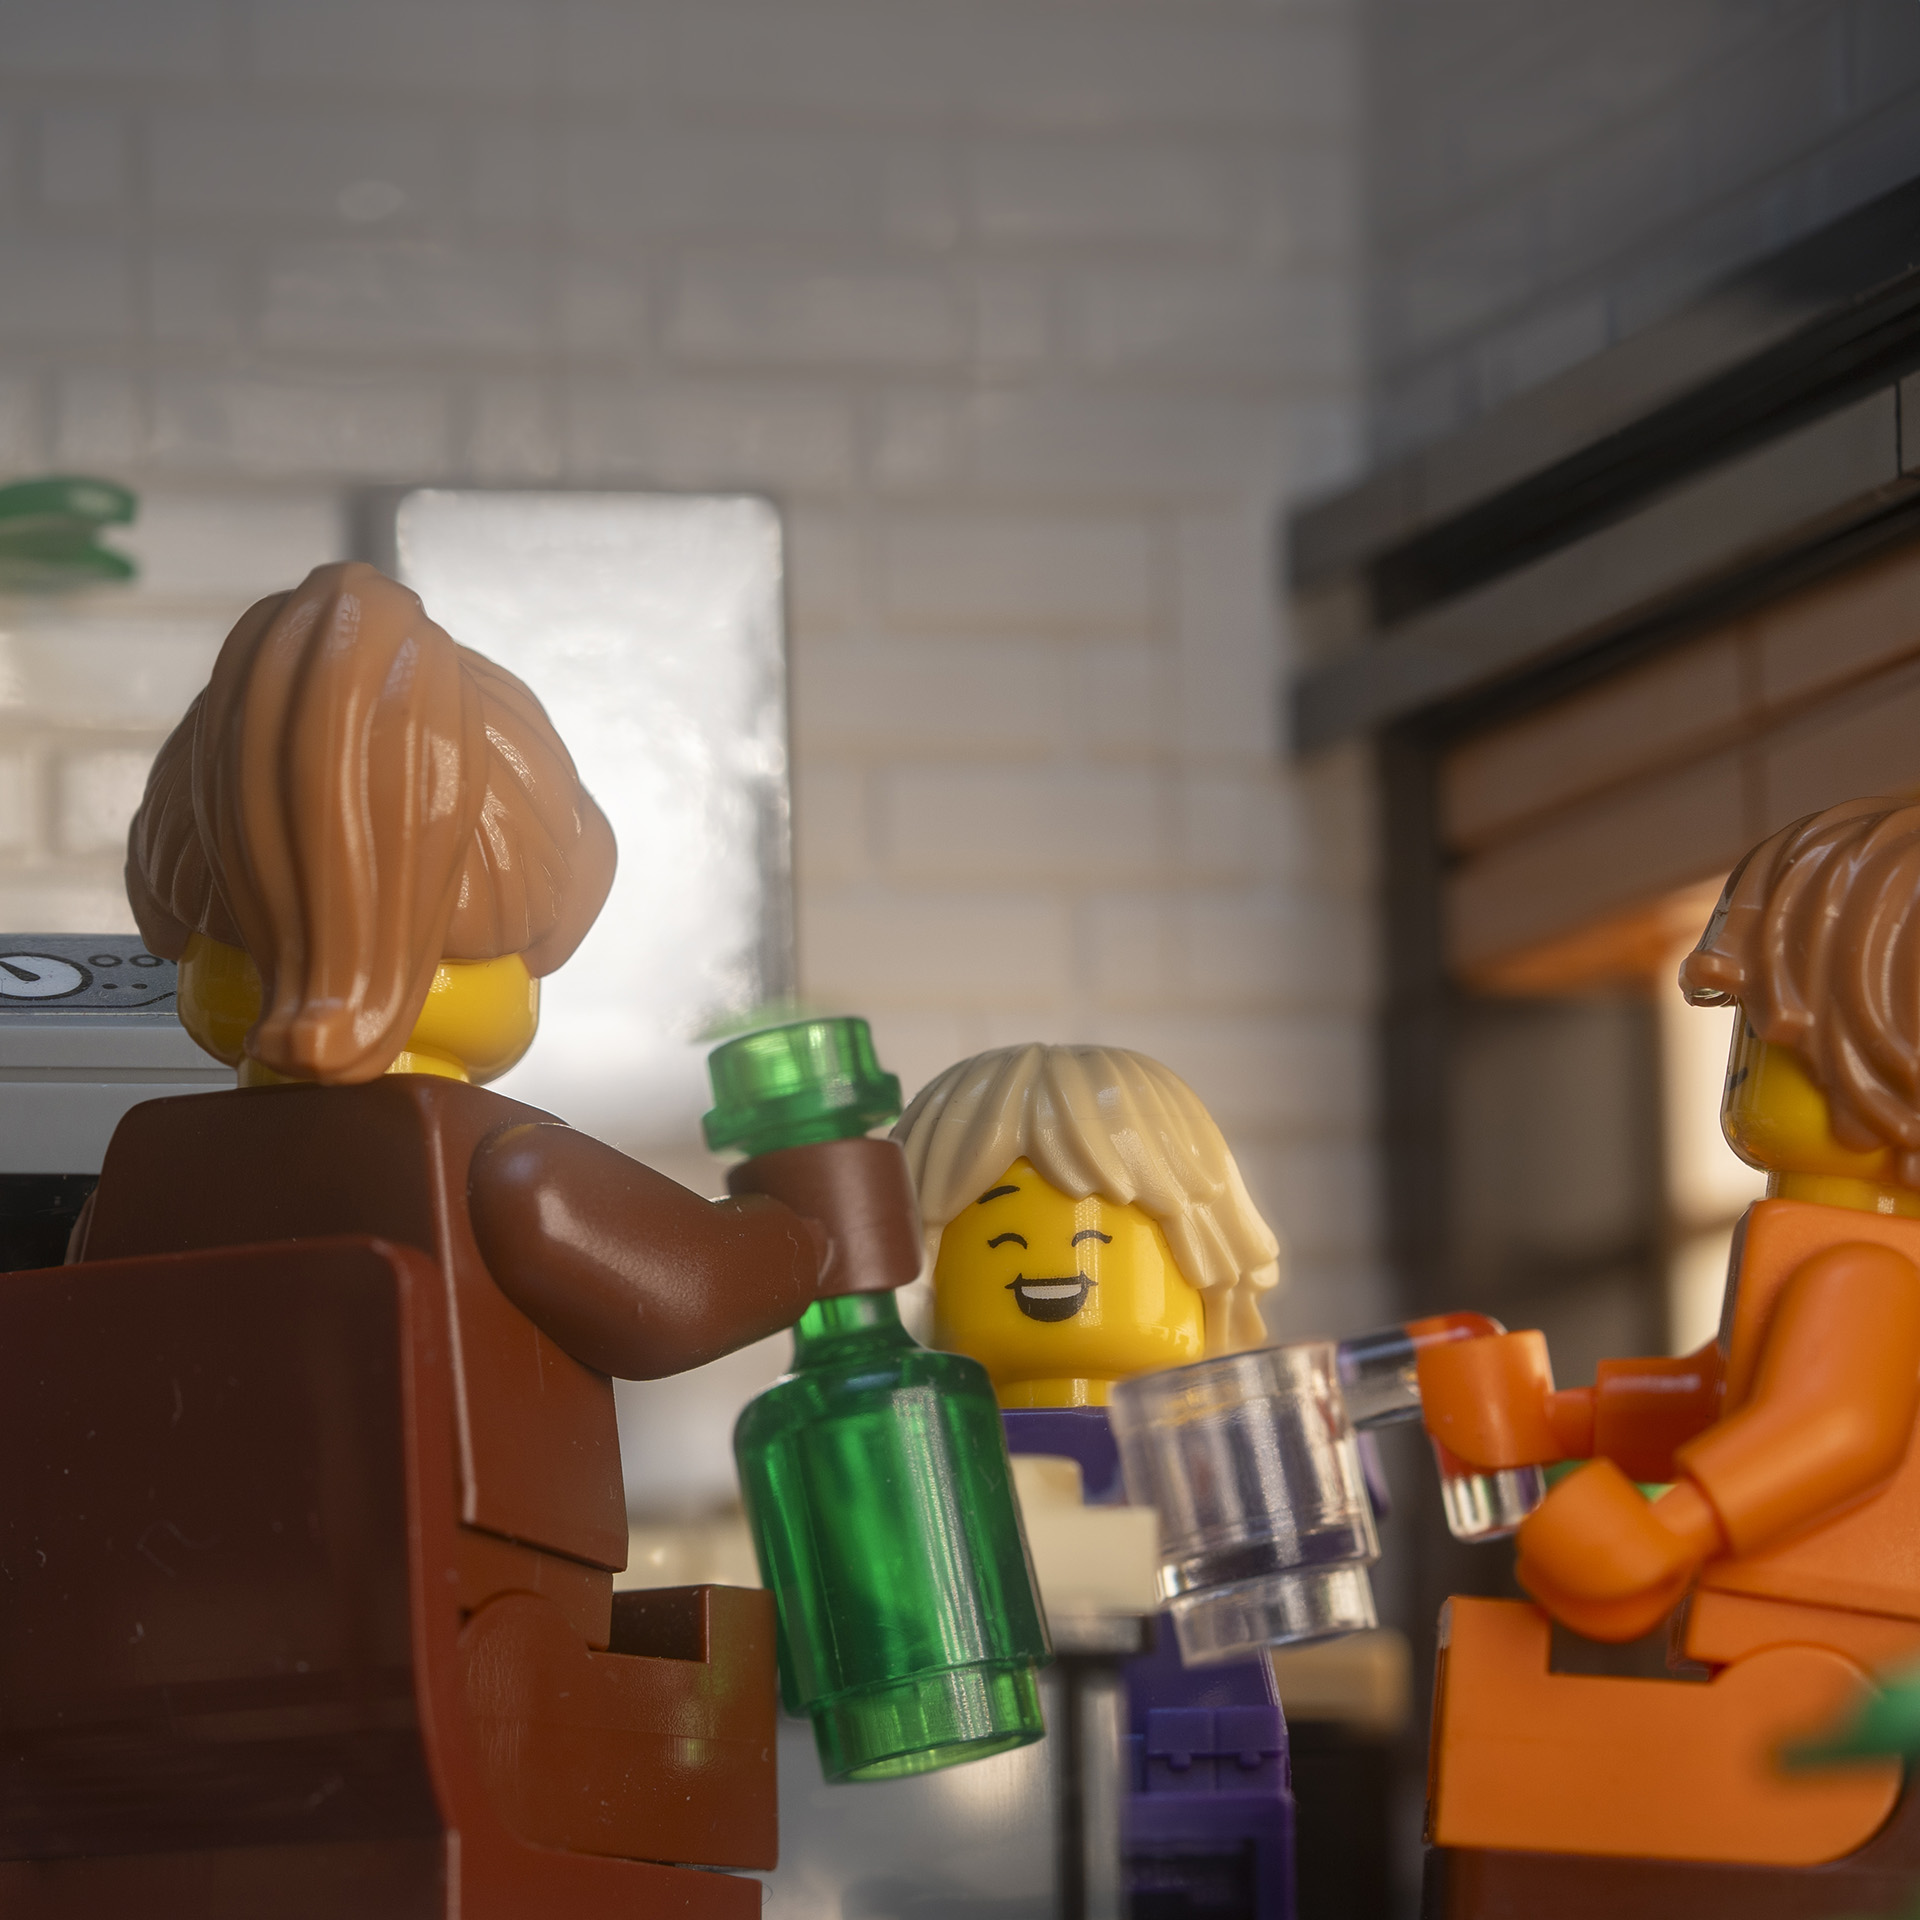
Departure to space the space center is coming up quickly. Early as it is, our friends enjoy a last coffee before they depart. Maybe a last good coffee for a long while, but with good company.
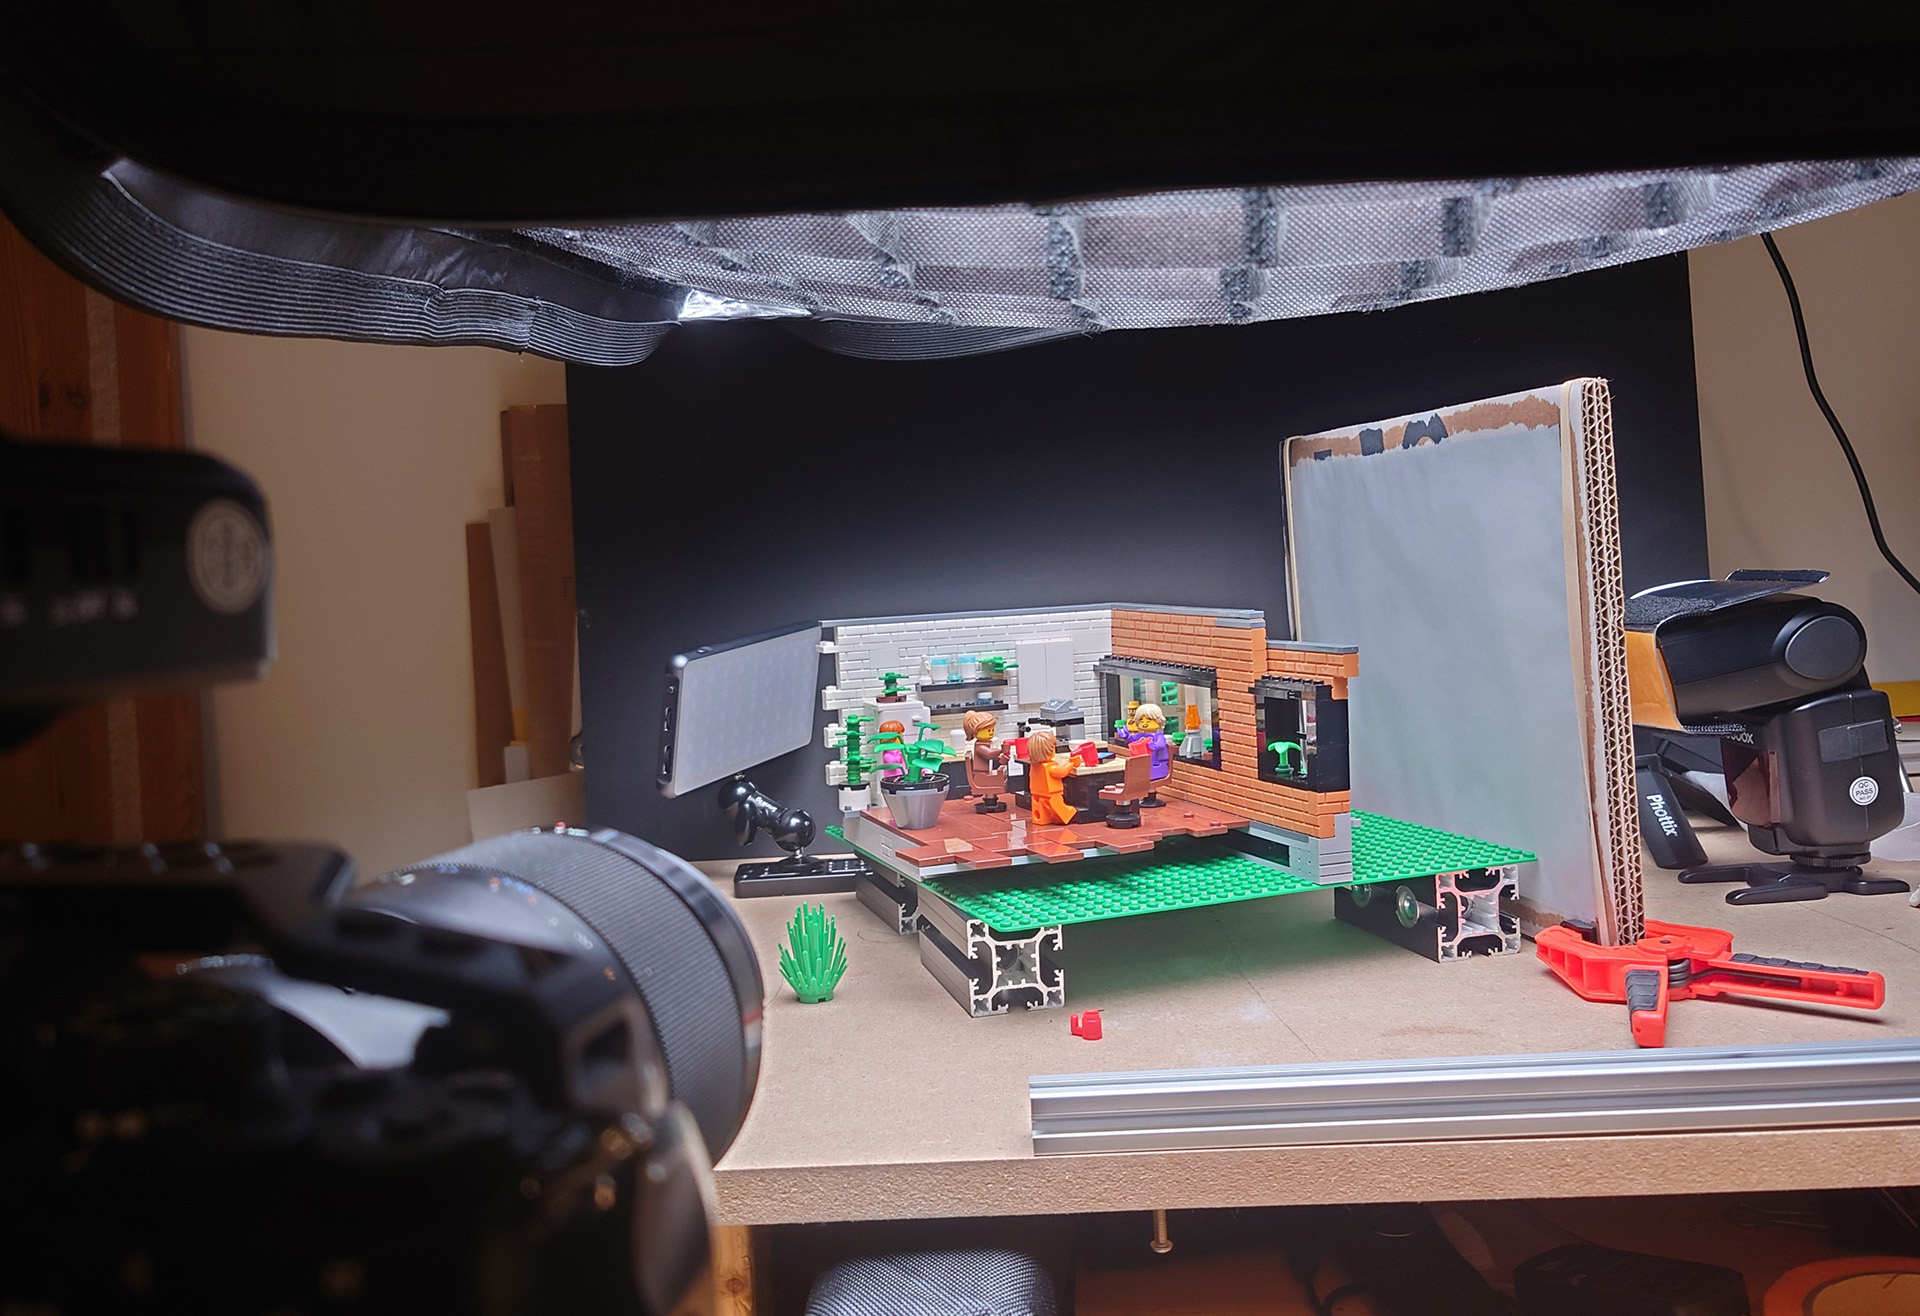
I used the Queer Eye – Fab 5 loft #10291 set and rebuild it a bit to function as an interior, this worked quite well and I believe I will save this setup for future shots. I wanted it to be early in the morning to experiment with the golden hour light setup.
Behind-the-scenes
For the lighting I switched to flash lighting with two color cards (yellow and red) to create the amount of light for an sunrise and the proper color for it. The toplight is a LED light as an indoor light this works fine.An image of my first shoot for this picture. The scene is a bit more intimate but looks more like an evening drinking than an early coffee.
Camera Settings:
Sony A7IV & Sony 90mm Macro lens
1/20th of a second, F8 Iso 200
Lighting:
There are two main lights in this shot. The first is the indoor lighting, done by the Godox SL60W with a softbox and grid. The second is the sunrise from outside, done by the Godox tt600s Flashlight with remote trigger and two color cards (yellow and red) to provide the amount and color of light for the sunrise. The flash shoots through a big double diffuser. (there is another light in the BTS photos, but it isn’t used).
The whole shot is brick-built, behind the window looking outside are some Lego trees to end the line of sight.
The whole shot the automatic metering of the camera shows a low light indication, but this is because it doesn’t know the flash is going to provide the missing light.
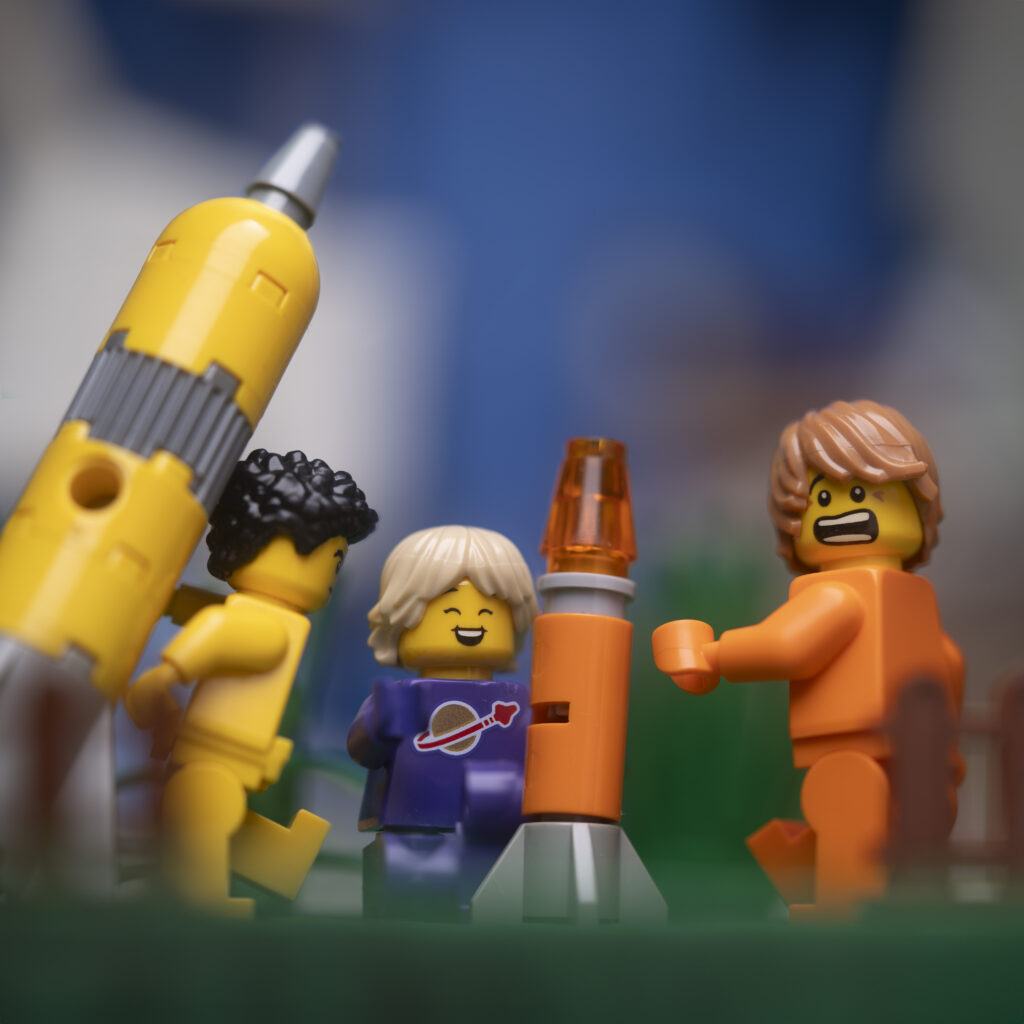
To be a Space figure in later life, you need to start practicing when you’re young. Some of the classics overdid it though, that size rockets got dangerous.
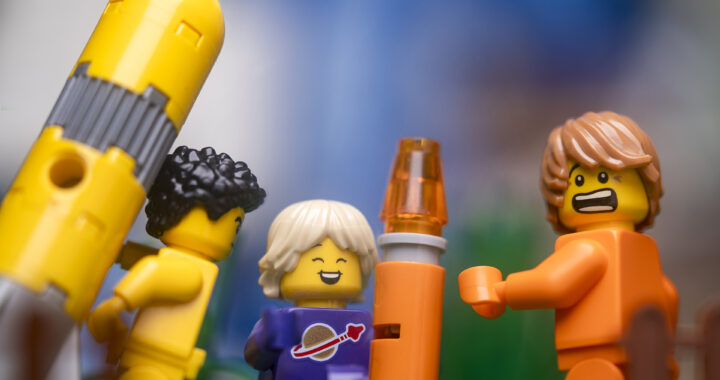
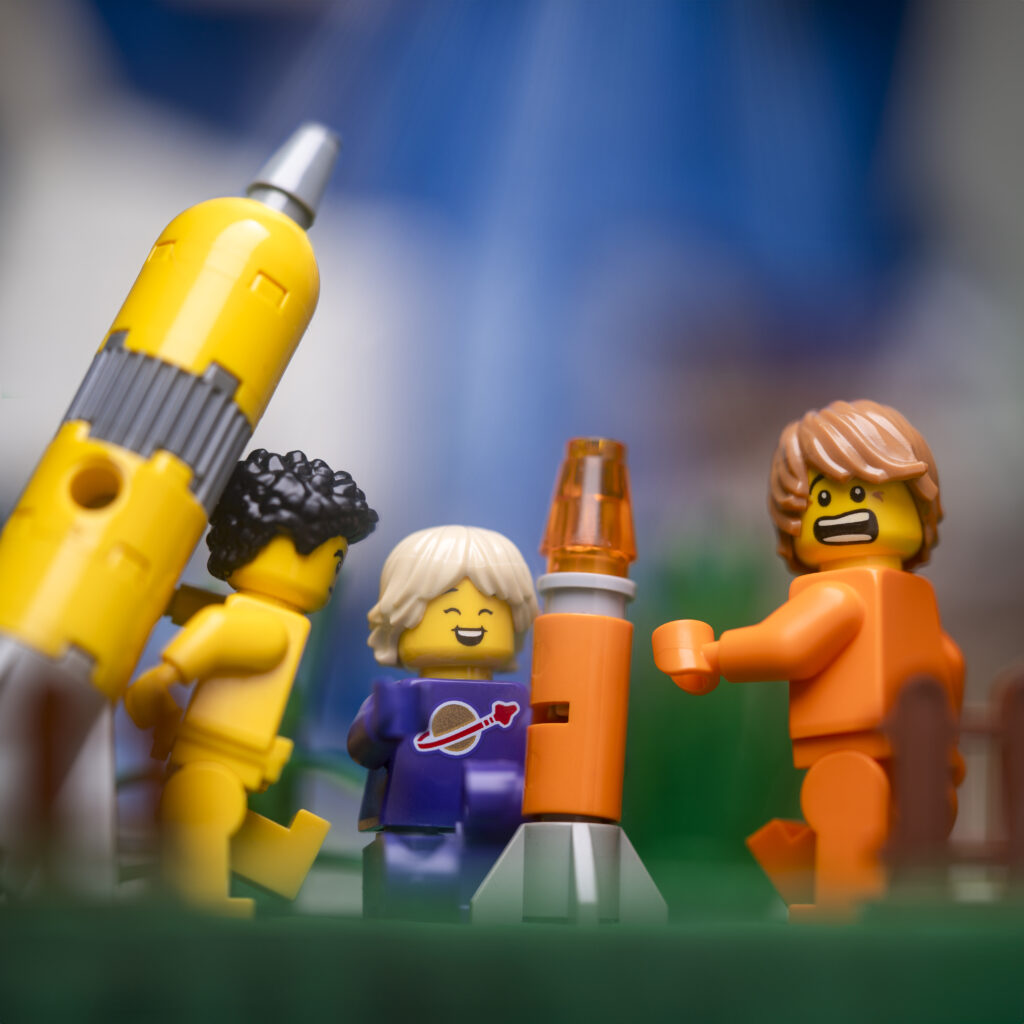
This week the challenge is to create an adventurous toy photography image that is centered around your protagonist in the residential zone of your city.
Our Protagonist (purple) and his friend (orange) are in the communal gardens of their neighborhood launching their toy rockets. The old classic (yellow) overdid it with bigger rockets.
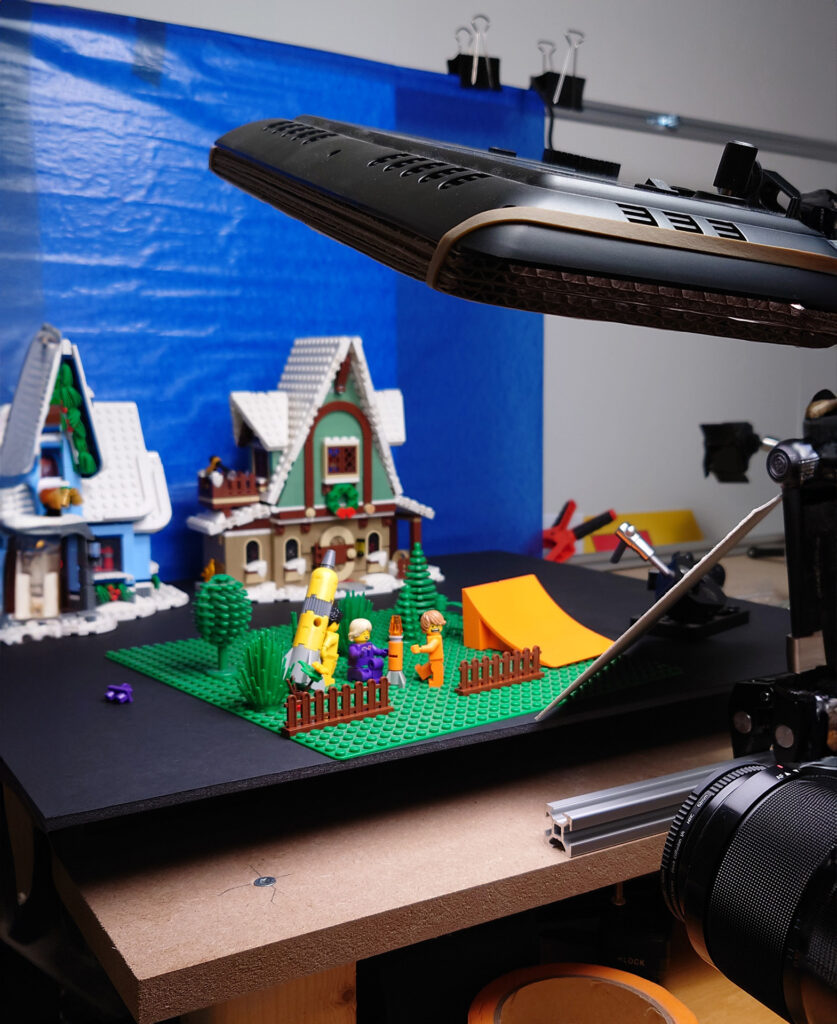
Behind-the-scenes
Camera settings:
Sony A7IV & Sony 90mm Macro lens
1/100th of a second, F2.8 Iso 100
This is a photo stack edited combined in Photoshop
Lighting:
The Main light is a Yongnuo YN600 Air video light panel 5500K, this is the general light source. I created a new filter since the old one enough. The new filter consists of two thick layers of cardboard with a sheet of matte paper glued to it.
A cardboard sheet as a bounce card to reflect light back to the minifigures
Our story starts just before our heroes travel into space on an exploration and mining mission for their families. It’s a custom for our young explorers and miners to make their first trip when they finish school.
Often the classic space and modern classic space families buy payload and passenger places on board the Classic Space Association (CSA) rockets years in advance.
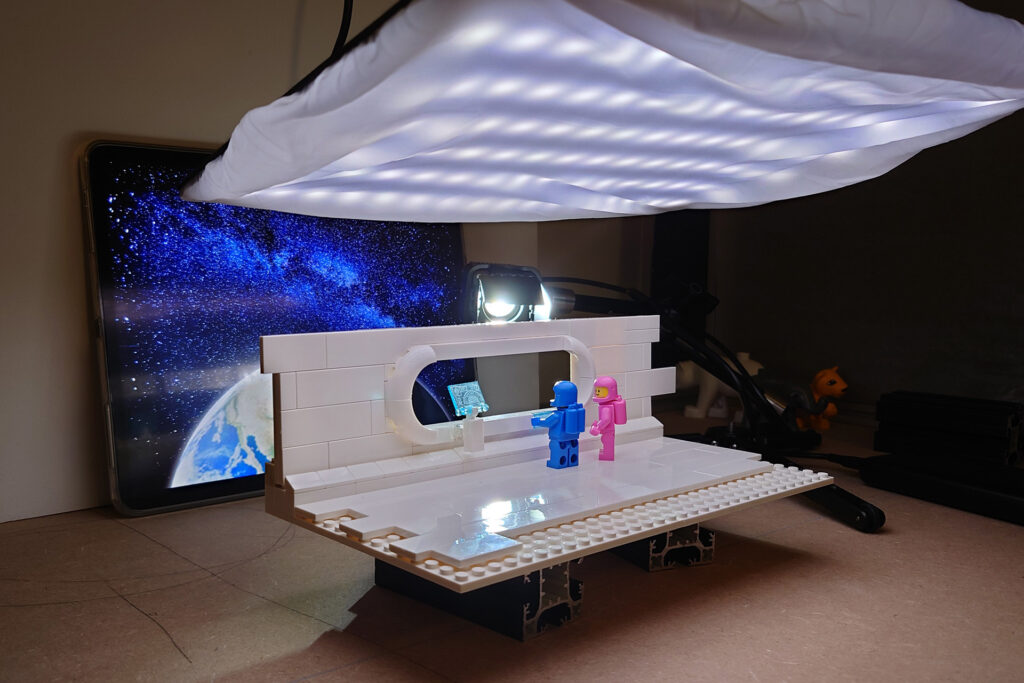
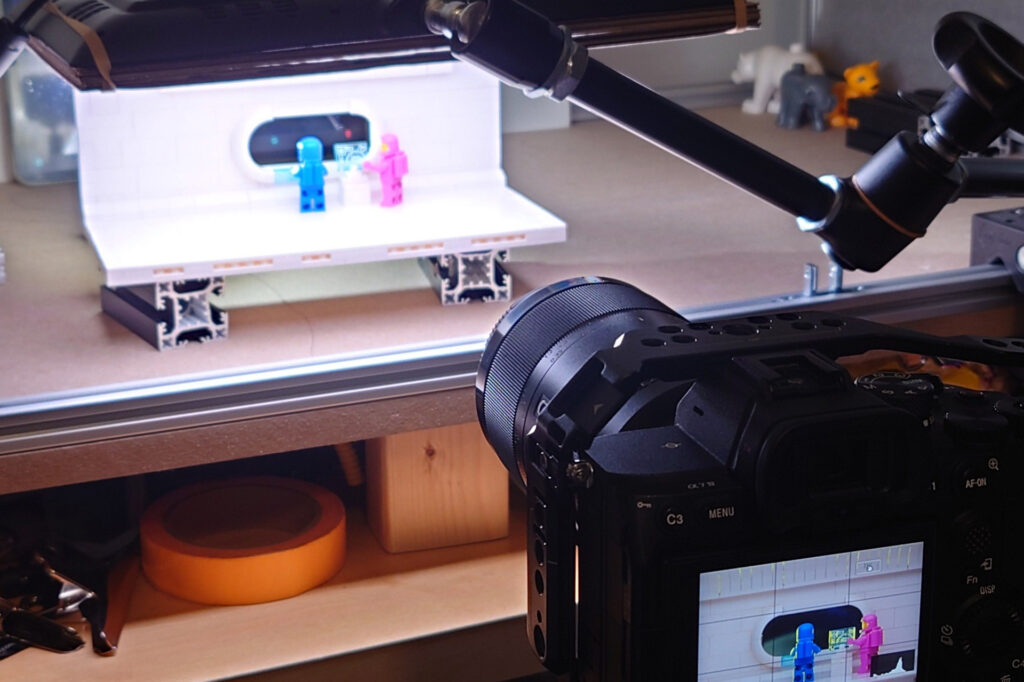
Behind-the-scenes
Camera settings:
Sony A7IV & Sony 90mm Macro lens
1/8th of a second, F8 Iso 100
Lighting:
The Main light is a Yongnuo YN600 Air video light panel 5500K, this is the general light source and is filtered a bit to make it more diffuse
The rim light is a Lume Cube LC-V2 without any filters, this is used to highlight the helmets and shoulders of the Minifigures
The background is a screen displaying a picture of a starry sky with the earth prepared in Photoshop